


Views: 0 Author: Site Editor Publish Time: 2026-09-30 Origin: Site


Plastic manufacturing presents a fundamental tension for product teams everywhere. Tooling requires significant upfront capital expenditure. Meanwhile, fabrication lead times directly gate your critical time-to-market. Standardized "4-to-6 week" quotes often hide crucial assumptions. They routinely gloss over mold complexity, material availability, and essential sampling iterations. Miscalculating Minimum Order Quantity (MOQ) and lead times causes major downstream issues. It inevitably leads to over-investing in rigid tooling. Alternatively, you risk missing critical product launch windows. Procurement and engineering teams desperately need a realistic, evidence-based framework. This guide provides exactly that. We help you align tooling specifications, production volume, and supplier capabilities effectively. You will learn how to navigate standard mold classifications accurately. You will also uncover the true timelines behind design approval and physical fabrication. Stop relying on optimistic best-case scenarios. Start planning your next manufacturing run with reliable, field-tested data.
Economical vs. Technical MOQ: Injection molding has no strict technical minimums, but economical MOQs are dictated by tooling amortization.
Standard Fabrication Baselines: Realistic lead times range from 2–4 weeks for aluminum prototype molds to 8–14+ weeks for hardened steel production molds.
The T1 Bottleneck: "First shots" (T1) do not equal production-ready parts; planning must account for 1–3 weeks of tooling adjustments.
Supplier Transparency: Reliable suppliers share DFM (Design for Manufacturability) risk assessments upfront rather than quoting best-case-scenario timelines.
Many buyers deeply misunderstand the concept of Minimum Order Quantity (MOQ). They assume injection molding machines simply cannot run small batches. This remains a persistent myth. The press can easily produce just 50 parts if necessary. However, suppliers enforce MOQs strictly to absorb setup times. They must ensure efficient machine utilization across their facility. Setup involves hanging the mold, purging old resin, and dialing in temperatures. This process takes several hours. Economical MOQs focus on absorbing these fixed costs across enough parts.
To align your volume needs, industry standards use SPI (Society of Plastics Industry) mold classifications. This framework maps tool durability directly to production expectations. Choosing the right class prevents over-engineering your custom plastic tooling. You only pay for the durability you actually need.
Let us examine the core SPI classifications.
SPI Mold Classifications as a Volume Framework
SPI Class | Typical Material | Target Volume | Cost Profile & Lead Time |
|---|---|---|---|
Class 105 (Prototype) | Aluminum or Epoxy | Under 500 parts | Fast lead times, low CapEx, high piece price. |
Class 103 / 104 (Bridge) | P20 Steel or High-Grade Aluminum | 10,000 to 100,000 parts | Moderate upfront cost, balanced unit economics. |
Class 101 / 102 (Production) | Hardened H13 Steel | Over 1,000,000 cycles | High upfront cost, lowest unit economics, long lead times. |
Strategic alignment requires careful upfront planning. Map your projected 12-month demand directly against expected tool life. Determine your true economical MOQ based on these numbers. If you only need 5,000 parts annually, do not invest in a Class 101 mold. The capital expenditure will ruin your profitability. Conversely, relying on a Class 105 aluminum tool for high-volume production invites disaster. The soft metal will degrade quickly. This degradation causes severe dimensional variations in your final parts. Always let your business outcomes dictate your tooling class.
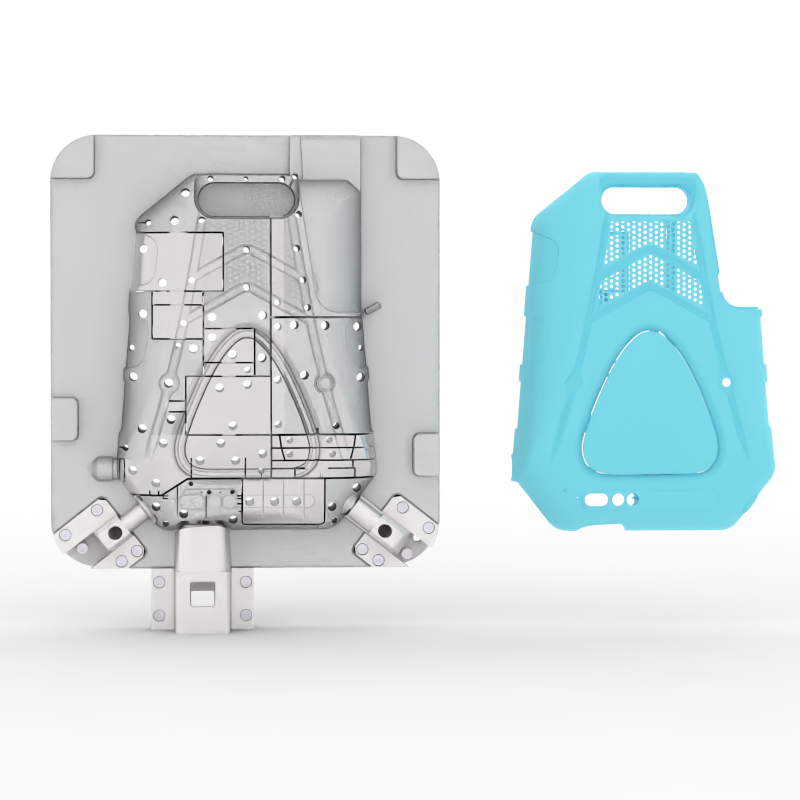
Many teams mistakenly start the lead time clock right when they issue a Purchase Order. This approach guarantees immediate schedule slips. The real clock starts only after Design for Manufacturability (DFM) approval. Let us deconstruct the four critical phases realistically.
Before cutting any metal, engineers must finalize the mold design completely. They run moldflow simulations. They evaluate gate placements precisely. They verify draft angles and optimize cooling channels. Once both parties agree on these details, you lock in the design. Only then does the fabrication clock begin ticking.
Machinists now shape the core and cavity. Fabrication timelines vary wildly based on geometry. Simple, single-cavity molds finish rather quickly. Multi-cavity molds require extensive CNC machining and Electrical Discharge Machining (EDM). Adding complex actions like sliders or lifters extends this phase significantly. Toolmakers need extra weeks just to fit these moving parts perfectly. Harder steels also slow down cutting speeds dramatically.
This phase produces the first physical parts out of the press. Do not expect perfection here. Expect short shots, noticeable sink marks, or minimal flash along parting lines. The goal is gathering baseline process data. Engineers measure these initial parts carefully. They compare physical shrinkage against the original CAD predictions.
Suppliers analyze the comprehensive T1 inspection report. They adjust mold dimensions accordingly. Sometimes they must weld and recut specific areas. They apply final texturing and critical polishing. Finally, they dial in the precise process parameters. This iterative loop ensures mass production yields consistent, high-quality results.
Every sector demands entirely different approaches to mold fabrication. Expectations for tolerances, materials, and compliance heavily dictate your overall schedule.
When sourcing custom plastic injection parts for industrial applications, structural integrity remains paramount. Engineers frequently specify highly abrasive materials. Glass-filled nylons and polycarbonates dominate this space. These rugged resins resist harsh environments perfectly. They withstand heavy impacts and chemical exposure. However, they drastically impact fabrication timelines. Abrasive materials require harder steel tooling to prevent premature wear. Machining and polishing H13 steel takes much longer than cutting standard P20 steel. Consequently, MOQs for industrial parts often sit in the mid-volume range. Buyers must justify the heavier tooling investment by ordering larger initial batches.
Conversely, producing medical plastic components shifts the focus entirely. Biocompatibility and regulatory compliance dominate the process. Manufacturers must mold parts under strict ISO Class 7 or Class 8 cleanroom constraints. They utilize medical-grade silicones, PEEK, or specialized cyclic olefin copolymers (COC). These regulatory demands add massive administrative layers. Extensive IQ/OQ/PQ (Installation, Operational, and Performance Qualification) validation phases are strictly mandatory. Engineers must prove the machine produces identical parts every single time. These intense validations easily add 4 to 8 weeks to your overall project timeline. This delay occurs independently of the physical tool cutting process. Always factor these qualification windows into your product launch schedule.
Even perfectly planned schedules face unexpected roadblocks. Understanding common pitfalls helps you write better custom plastic tooling specifications. Preventing these errors keeps your project moving smoothly. Let us examine the most frequent culprits behind stalled timelines.
Poor DFM Preparation: Submitting flawed CAD files guarantees delays. Inadequate draft angles prevent smooth part ejection. Non-uniform wall thicknesses cause internal voids and severe warping. Impossible undercuts require major, time-consuming redesigns. Address these specific issues internally before requesting formal quotes.
Over-Tolerancing: Do not apply blanket tight tolerances across the entire part geometry. This common habit drastically increases machining time. It also forces unnecessary iteration cycles during T1 sampling. Instead, identify critical-to-function (CTF) dimensions. Focus your vendor's precision efforts only where they matter most.
Material Availability: You might finalize the tool quickly, but resin shortages will stop production cold. Specifying niche resins without checking supply chain realities is incredibly dangerous. Your tool might sit ready on the shelf. Meanwhile, the specialized resin could easily be 12 weeks out. Always verify material lead times early.
Surface Finish Requirements: Cosmetic requirements dictate final polishing times heavily. Standard textured finishes wrap up rather quickly. High-gloss finishes require meticulous, time-consuming diamond polishing. Achieving an SPI A-1 finish can add days or even weeks to your timeline compared to standard finishes.
Selecting the right custom plastic tooling supplier determines your project's ultimate success. Evaluate potential partners based on their operational reality. Do not simply select the lowest quoted price.
First, weigh the domestic versus offshore trade-offs carefully. Offshore tooling usually offers significantly lower upfront costs. However, you must account for communication latency. You must also factor in extended ocean freight or expensive air shipping delays. Domestic tooling generally costs more initially. Yet, it delivers faster iterations, easier site visits, and stronger IP protection.
Second, prioritize vendors who maintain a dedicated in-house tool room. Outsourced tooling adds immense risk during the critical T1 tuning phase. In-house teams can repair and modify molds immediately. They avoid shipping heavy steel tools back and forth to third-party shops. This capability saves weeks of wasted transit time.
Third, demand tool ownership transparency upfront. Ensure your contract explicitly states you own the mold once fully paid. This vital clause gives you leverage. You can transfer the tool to another facility if the vendor fails to meet production MOQs. It protects you if their quality standards suddenly drop.
Finally, vet their proposed timelines for sheer realism. Be highly skeptical of anyone offering exceptionally fast lead times without first requesting a DFM review. Real manufacturing requires deep geometric analysis. It never relies on arbitrary sales promises. A trustworthy partner highlights potential risks early. They do not hide them behind optimistic schedules.
Planning MOQ and lead times requires a delicate, informed balance. You must carefully weigh initial capital expenditure against long-term unit economics. You must also respect strict product launch schedules. Accurate forecasting relies heavily on aligning SPI tooling classes with realistic design phases. You cannot ignore mandatory sampling windows.
Follow these actionable next steps:
Base your initial volume estimates on realistic 12-month market projections.
Categorize your tooling needs accurately using the SPI classification system.
Audit your CAD files internally for basic manufacturability.
Confirm material availability before finalizing your tooling design.
Stop asking for generic price lists based on incomplete data. Instead, request a comprehensive DFM audit from your prospective vendors. Demand a targeted tooling quotation based on your specific annual volumes.
A: A standard production mold typically requires 6 to 10 weeks from final DFM approval to the T1 sample. After the first physical parts emerge, you should allocate an additional 2 to 3 weeks for essential tooling tuning, texturing, and final polishing.
A: Yes, you can expedite the process by utilizing aluminum prototype molds or minimizing complex mold actions like sliders. You can also pay expedite fees for priority CNC machine time. However, the initial DFM engineering review cannot be rushed without risking severe downstream defects.
A: Injection molding has no strict technical minimums. Economical minimums depend entirely on the vendor's setup constraints and tooling amortization goals. Economical production runs usually start between 1,000 and 5,000 parts, depending heavily on the physical size of the molded component.
A: Unless structured as a subsidized or amortized tooling agreement, the buyer typically owns the mold outright once they pay the final invoice. Always verify this transfer of ownership explicitly in your initial tooling contract to ensure portability and protect your intellectual property.


